Search This Blog

2014/06/28

Log 2014062802

The DC jack on the Midland WR-100 is 12V and tip positive. I purchased a DC  car power adapter for this unit today and confirm that it works. It will be replacing my former weatherband radio which did not tune well. This one is digital and performs better.

The bad news is that I don't know if a marine head unit would perform better? It would need to have its own GPS, or actively scan for the nearest station and interrupt whatever I'm listening to when a weather emergency occurs. I just haven't found a head unit like this.

Today, I purchased an eyelet to screw in to the tailgate latch plate that will route my paracord so that I have an easier manual release. Also, I purchased some silicone.  The plan is to drill through the hull of the battery and spare tire compartment to run my trailer lighting cable out of the car so that I don't have to slam it in the tailgate door anymore. On the trailer hitch, I'll be installing a mount for it. I also purchased a small flashlight with a key ring small enough to to fit the loop hole on the HHR's manual tailgate release.

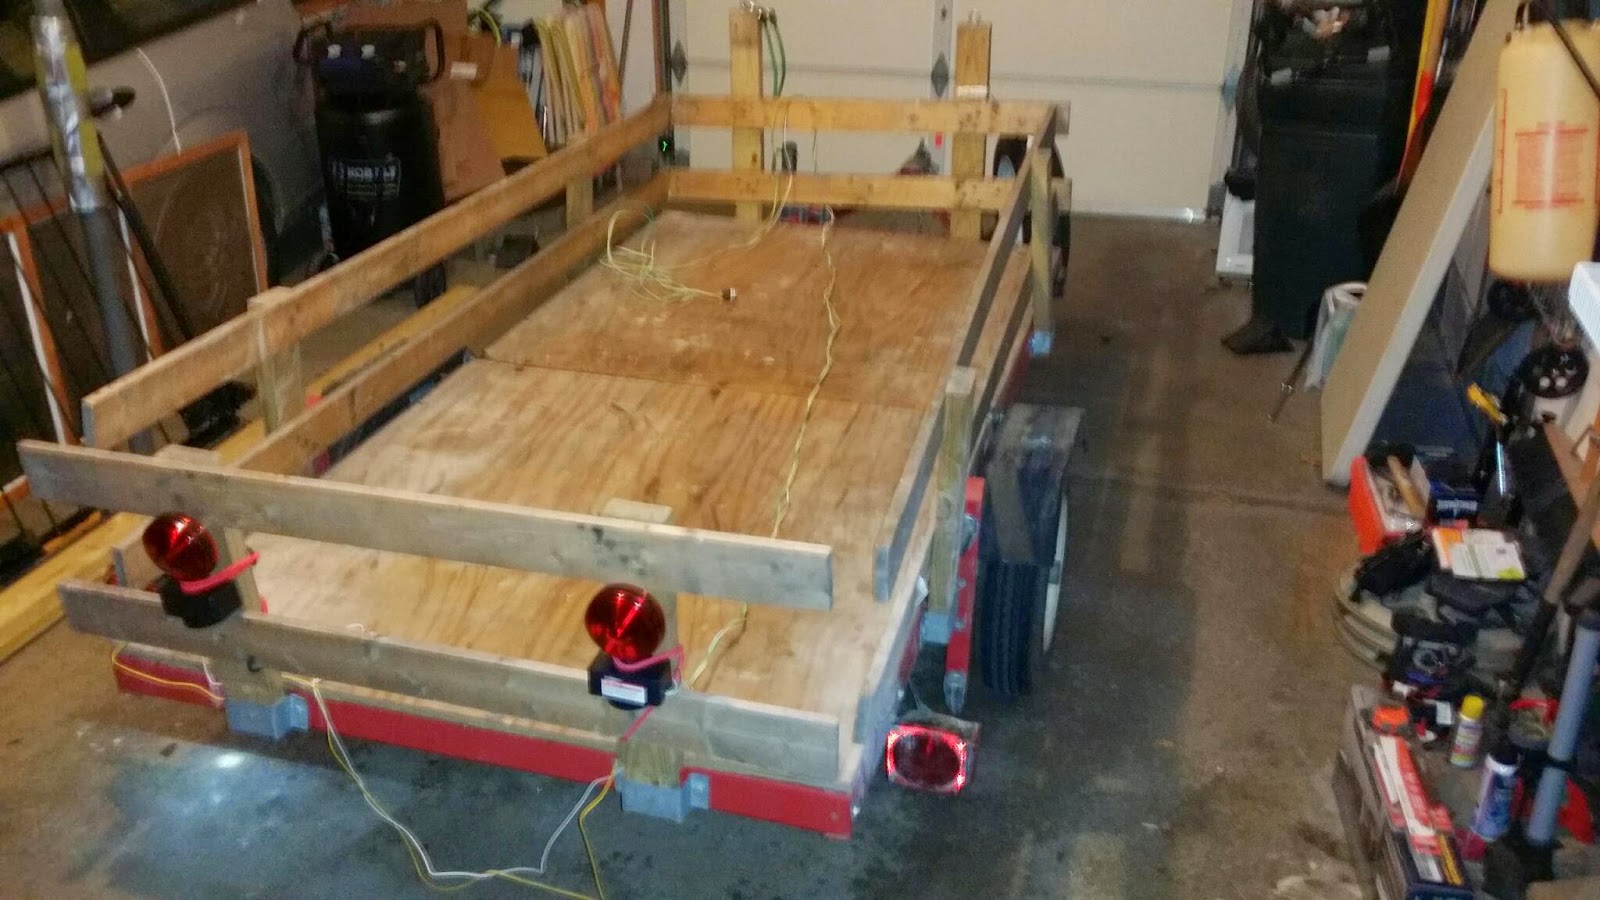
All of the trailer lighting connectors that I previously prepared for the tounge, separation point and lighting had to be replaced. I didn't keep track of the color coded wires that I snipped off and thought that they were irrelevant. 

Earlier, I found a set of orange side marker lights that have and actual ground wire.

The drilling is going to require lifting the back end of the car up. The only way to safely do without a lift that on my Chevy HHR LS is to back it up on ramps. So, I got those out of storage today, as well as some hiking gear. Once I get The Cramper's equipment out of there, Storage B will be pretty thin.

Log 2014062801

I did my very best and I hope that this works for others. I just took off the rear interior shielding on my 2008 Chevy HHR LS. The picks shown are of the tailgate release. My screwdriver is on the manual release.

My smartphone was having trouble with the light levels in making these photos. The manual release is a metal piece with an eyelet that is mounted on the driver's side of the tailgate release mechanism. It pushes toward the rear of the car to release the tailgate and is spring loaded. The side of the eyelet has a place, a cut out specifically designed for a flathead screwdriver that when it makes contact, you can push the screwdriver against it and it should pop the gate.

I took the crash shielding off today because I was unable to find it myself with the owner's manual, Haynes, or by help of any Internet forum. Speaking strictly in theory, the eyelet should be barely large enough to get a very small key chain ring on it. I plan on boaring another eyelet to the back of the tailgate release plate. Route some paracord from on eyelet, then through and around the new one so the tailgate releases on a pull string.

My tailgate release seems weak. In warmer weather, it takes about 3 consecutive pushes if the button to pop. In the winter, sometimes it won't come up at all.  It also has problems when I'm carring a heavy load in the back.

2014/06/21

Log 2014062101

The right rear brake was bled, then a new left front wheel bearing, left front shock/ strut assembly and right front fender was installed installed today. I forgot to take a mileage then, but the one I have now is at 136,251 miles on the odometer.  I did forget to rotate the wheels, but if I have to get the tire stems replaced, I might as well have those mechanics do it since they have a lift and are in the neighborhood.  My 2008 Chevy HHR LS requires that they be rotated front to back and back to front.  I did it last time and it can tip if the side on my CUV is jacked up too much.

So, I've done about the maintenance that I have to skills currently to do.  I took it out for about a 10 mile drive on the freeway this morning and everything seems to run as it should.  The brake pedal position seemed to improved and so far the car is taking well to the new DOT 4 brake fluid that I added prior to this drive, but still needs improvement.  If I had to, I'd say that it could handle the roads in southern Ohio, towing a loaded utility hauling trailer as it is.  But I'd like it to be better.

Right now, I have to go find my uncle who knows several mechanics.  They're all friends of the family and have worked on our vehicles many times.  I'll have to give him a list and would like to do that tomorrow.  But tomorrow is Saturday and I have a feeling that I know where he's going to be, which is at his camper in Sandusky of Erie County. He doesn't do text messages very well.  So, I anticipate my day tomorrow as consisting of doing a load of laundry and then spending the weekend out there.

One thing that I was not able to do while I was out was test the car to see if the new air filter would alleviate the problem that starts at 60MPH while trying to accelerate going slightly uphill.  It was raining this morning and was almost flash flood conditions on the freeway today.  So, I will test it some other time.

I don't think that this kind of information is on the web yet, but on the topic of building a teardrop camper on a Harbor Freight 4 x 8 Utility Hauling Trailer in Ohio... In the past, I have learned that there is a way to build a way to do it so that the living amenities slide off so you can still have use of your utility hauling trailer.  When I had my utility hauling trailer titled, I inquired about this and was informed by a Deputy Clerk of Court in Lake County that a "convertible" trailer like this would not be legal in Ohio because the trailer has to be registered one way, or the other... either a utility hauling trailer, or a camper and it can not be both.

2014/06/17

Log 2014071701

I finished plotting and correcting waypoints for parking areas along the southern sections of the Buckeye Trail.  At this point, I believe that I have all the information necessary to plan the trail.

2014/06/16

Log 2014061602

My Delton X9 Thunder continued to cut out in the wind.  Also, I'm 6'6"/ 198cm and music streaming from two different smartphone's cut out every time I clip them to my belt.  But, they do tend to do better when i strap them to my right arm only, or when my smartphone is on the handlebars on my bicycle mount.

I bought these sometime prior to 13 November 2013 and yesterday, the right channel cut out.  At which time, I performed a power cycle and it still wouldn't come on.  So, in testing the theory that it might just be on a low battery, I charged the device last night and attempted to use it this afternoon with no success... the right channel was still out.  This headset will be discarded today and I'll use wire earbuds for the time being.

After walking to the local Mexican restaurant and drinking a margarita today, I decided that it was not a good idea to resume working on my car.  I don't drink alcohol very much, so I'm a bit of a "light weight."  So, I started working on my bicycle.  With the car on jacks in one bay of the garage and another car and things being moved around on the otherside, making my work space tight, I started working on my bicycle on the back porch instead.  But found at dusk that the lack of light was unfavorable to true my rear rim again.  So, I began to install my double kickstand from bikewagon.com.  But the mounting hardware was incorrect.

The bolts that they sent me were either too small, or too large for my Nishiki Colorado mountain bike.  And the bolt that i had on the previous kickstand was about 1/8" too big.  Lucky for me, I happen to have a spare steel plate handy.  With two pieces cut to a similar size, I'm quite sure that i can make it fit.  But as the stand is kicked up, both wheels retract to one side and that will make it a tight fit considering that it has to miss and ride next to the rear wheel with a knobby tire.  But I think it will mount.

I got the double kickstand because of the new improved, 110lb capasity rear rack.  Standard kickstands with the 25lb capasity rear rack like to tip the bike over.  This double kickstand should lift the rear wheel off of the ground when it's deployed.

Log 2014061601

Today, I broke through the second mounting bolt on the left side stabilizer bar link of my 2008 Chevy HHR LS.  The last time, I burned up a few Diablo blades on the Sawzall and so I was searching for alternatives today.  Yesterday, I mounted the new left side wheel bearing and in preparation to bleed the brakes, I re-mounted the left side caliper and pads.  So my angle to drill it from wasn't as open today as it was before.

I started using a butane torch today, but several minutes in, I remembed something about the stabilizer bar being made out of tempered steel and promptly quit.  Yesterday, I purchased a drill bit extension from Lowe's in Mentor of Lake County.  But to my chagrin, it only extends 3/8ths drill bits and I was very disappointed.  With the Diablo blades on the Sawzall, I was able cut most of the hex off of the bolt.  But because the blade was so wide, it left a sliver of the hex still on there.  So, I mounted a metal cutting blade of standard width and was able to slice it off without damaging the stabilizer bar.

Afterwards, I took off the right fender.  It was just a series of bolts.  But to my chagrin, the after market replacement fender came with it's own eye socket wielded to it.  Now, I have an extra.  But the replacement didn't come with any insulation.  I'm thinking that I might be able to reuse the one from the old fender.  As for installing, I've decided that I'm going to "sleep on it."  Considering the amount of bolts it and the under shielding has, I'm wondering if that is going to be a mistake?

I was about the bleed the left front caliper solo today, but didn't have a clear tube big enough to fit around the bleeding nut.  And I'm concerned about no doing it right, so either I need a vacuum bleeding kit, or I should just task it out to the mechanic?  I think I'm going to go with the latter. Because right now, I'm at a loss as to where the manual transaxle "check/fill" nut is.  I think its to the left of the fuse block and has a hex key that is identical to the drain plug.

With all that being said, there'a bald spot on the table where I layout all of my new auto parts now.

2014/06/13

Log 2014061301

I bled the right rear brake line today and moved to the front left wheel afterwards. The new shock & strut was mounted in the shock housing, but remains unfolded at this time as I'm working on that side's wheel bearing, too. I was able to dismount it, unlike last time where I gave up and had the mechanic do it. Basically, with the strut/ shock dismounted from the wheel bearing, I was able to push back the axle, turn it downward and I started beating it with a metal claw hammer until it fell out.

I just now discovered that the auto parts store sold me an ABS replacement wheel bearing. My car does not have ABS and the product that they gave me is not compatible with my car. So, I'll be making a return later today.

Right now, while I'm down there, just like the other side, I have to install another stabilizer bar link there, too. Well, just recently, I picked up some Diablo Steel Demon blades for my Sawzall.  And so far, they work impressively well. It cut through the stabilizer bar link "in no time flat." But I'm not done cutting the inside nut and bolt that is attached to the stabilizer bar.

There's not a lot of room to work with and things are kinda crampt working with the Sawzall in that wheel well.  In the future, I anticipate that this part of the job will take at least 45 minutes and 4 of the before mentioned Diablo blades.

Sawzall blades get really hot when cutting metal. I learned on the Internet to use a spray bottle of water to cool the blade and surface being cut. Bleeding the brakes and changing the manual tranmission still remain on my task list for this wheel. Other than that, work on the left rear wheel and front right wheels still remain as well as a tire rotation.

For the record... my touring tires that are on the car should last until it's at 204,000 miles.

2014/06/12

Log 2014061202

My Roswheel Rear carrier bag for my mountain bike came in today from Hong Kong via USPS.

Log 2014061201

So, my brother came over to assist me with bleeding my brakes. But as indicated in a previous log, I didn't have the right wrench to open the bleeding nut on my Chevy HHR's. So, I moved on to smaller items and replaced the air filter and the one in the cabin instead.

The current milage on the car today is 136,231mi.

I purchased two more wheel chalks for about $4 each at Walmart in Mentor of Lake County. 

I purchased new screws to bore into my manual transmission shaft and finally hold my after market T shifter in.

Earlier this evening, I cyphoned the old brake fluid out of the master cylinder and replaced it with new DOT 4 fluid. But at this time, the air in my brake lines has not been bled yet.

I purchased new clear hose that will fit around my brake caliper bleeder nuts. The other end of the hose will be inserted in a modified Gatorade bottle and I'm hoping that I'll be able to observe their stream by sticking my head out of the window or watching in my rear view mirrors as I pump the pedal from the driver's seat.

I have my repair strategy laid out in my "Construction" task list tomorrow because each brake caliper has to be bled one at a time, while some of the wheel sites have other tasks to perform there as well.

2014/06/11

Log 2014061101

The brake bleeder valve bolt on the rear drum brake caliper requires a 5/16ths wrench. The metric equivalent is not precise enough and will round it. So today, I purchased a new 1/4" and 5/16" SAE wrenches from Lowe's in Mentor of Lake County for about $5 each.

2014/06/10

Log 2014061001

I installed the new 5/8 trailer hitch pins in the rail mounts. They're snug and do the trick better than the 3/8 bolts that I was previously using.

At this time, I don't believe that the rails need to be redesigned. 

The company that sold me the rim for my full size spare, gave me one with a four hole pattern, instead of a five.  Today, they sent me a return label and I dropped it off at the UPS store for an exchange. They told me that as soon as they get confirmation of it being shipped, they'll send out the replacement. But the spare tire apparatus is mounted to the trailer now and is awaiting that wheel.

At this time,  I know that the castor wheels on the utility hauling trailer need to be replaced with larger ones.

Recently, a new Sawzall, jigsaw and 1/2" corded electric drill was procured. I was unable to get the previous nose off of my former corded drill so I could switch it from 3/8" to 1/2". After taking the Sawzall to it in attempt to destroy half of the nose,  I found that I couldn't break through the metal center to lop it off, so I ended up going to Lowe's in Mentor of Lake County and purchasing a superior Skil unit with a rotating second handle. It was necessary to support my new 5/8ths metal and wood drill bit that I needed to bore out the trailer hitch pin holes that mount the rails where it had used 3/8ths before.

Right now, there are a bunch of items being shipped that are late. The new rear rack bicycle bag is one of them. That part of the bike is already tore down and awaiting their arrivial.

Right now, the new detachable wiring harnasses for the trailer's underside deck  separation and rear lights quick wiring bypass are cut and ready to be installed.

Today, I ordered 2 sets of rubber trekking pole bottoms. I purchased them for about $7.50 a pair on Amazon.com.

2014/06/07

Log 2014060701

I repadded my cycling helmet today. And the SC Delco manual transaxle fluid for my car came in the mail today. Otherwise, I took my utility hauling trailer to my relatives house today and loaded up some yard waste, but with the license plate light still being out, it was too late to haul it to the recycler.

My automotive repair tasks have been prioritized. And I just started the list for the trailer rails upgrade. I found that the back door would have to be 48in tall to act as a ramp itself.  That is unacceptable because it would be taller than the car and act as a wall when the caravan is in motion.  I, instead, opted to build the rails to 3ft tall and install slots on the outsides so that they transport four ramps of 1" x 6" that are 6' long. They'll have slots on the back door and together, they should make a 6' ramp. The tool bay has wheels. And it's the heaviest thing that I transport. It's probably over 300lbs and is the hardest thing to load and unload.  Last year, I avoided doing it at all costs.

I wanted to get some front bars mounted like you would see on the front of a police interceptor.  If it's legal, I could mount a 5,000lb wench.  My Chevy HHR and trailer are about 4,600lbs together and if I ever got stuck, I could just get myself out. But finding this for a car, and not a truck is difficult. So, these items are not essential to me at the moment are a "would be nice" item.

2014/06/06

Log 2014070602

Last year, I mounted my large gear and tool bays along the front and side rails if my utility hauling trailer because I wanted their weight to rely more on the car's rear suspension. But in all that time, I questioned whether that was the right decision, especially since I've recently done some work on the car's springs and struts.

This year, I plan to relocate those bins so they sit directly over the trailer's axle.  Well, strapping them over the trailer width wise like I always have isn't a problem. But, doing it length wise is now.

There's two problems when mounting there. First is that I'd have to use towing steps over the top of the bins that would reach around and hook to the bottom of the frame. That would interfere with the proper packing of the trailer. 

The other thing is that I could install hooks, but since the back rails are being redesigned to function as a ramp, specifically for the bins (they're heavy and have wheels. Standard hooks would I'm peas the bind and defeat the purpose of the new rear door.

So, I purchased some new recessed hooks. Special holes in the trailer's floor will need to be cut out in order to mount them.

Log 2014060601

Last year, I did an adequate job wiring my 1195 Lb. Capacity Heavy Duty Folding Utility Trailer that I purchased from Harbor Freight Tools.  But I left it's wires drooping in anticipation that I was going to fold it someday.  Well, when I placed it in storage, while folding it, I taunt and stretched the wires.  With all of the wire shorting problems that I've had between the trailer and car, I don't dare trust them again.  So, the trailer needs to be rewired.
But I got to thinking this evening that there's no way to do this right when folding without having some kind of separation.  Last year, I probably played around with using some kind of bullets.  But as I understand, those are usually designed for wires typically used in model aircraft and small RC cars.  I never found one that could interface to a 6 gauge battery cable so that my marine battery on the trailer could charge on the trailer while it's in motion.

So, what purchased today from Walmart in Mentor of Lake County are 5 - trailer extension wiring that have both a male and female ends for a 4 flat connection.  I intend to use the first two at the midsection and the others at the trailer's taillights. That will give me the separation that I need.  And the midsection connections should be rugged enough to stay connected and not accidentally ground to the frame.

Since my floor is wood, I also purchased some mounting brackets that one would use in a house to pin coaxial cable to a base board.  I plan on tacking that up under the trailer to hold my wires so that they don't sag.  The connectors at the taillights are there for diagnostic and by-pass purposes.  If I'm down trail, I may not be readily able to diagnose, by-pass, or re-wire the main lines.  With these new connectors, I can run a temporary by-pass on top of the floor and have full running lights in the meantime.

On a seperate note... I applied this year's sticker on the trailer's license plate today.  The temporary by-pass lighting was mounted to the rear rails.  But I discovered that the left turn signal wasn't working.  I tested them two days ago and found that both worked.  Therefore, there is a short in the car at the location where the hitch wiring was installed.

Leaving the Storage B, there wasn't any issues with the trailer linking up to the car or while driving.  While at the gas station, they didn't have any alkaline AAA batteries, so I reluctantly purchased some lithium ion's instead.  With the main taillights out, they were for a headlamp that I wrapped around one of the taillights that serves as the license plate light as well.  The headlamp is for people who go in caves, or hikers.  But it has an elastic band that I mounted to the taillight so it would illuminate the license plate.

2014/06/05

Log 2014060502

My spare rim, tire and 8800mA laptop battery arrived one day ahead of schedule.